Tile Installation: What to Expect, What Goes Wrong, and How to Choose the Right Tiler
A complete guide to tile installation for homeowners — what the process involves, how long it takes, what questions to ask a tiler, and what separates good work from bad.
Most homeowners have tiles installed once every decade or two. The process is not something you need to understand in detail, but knowing the basics means you can ask the right questions, recognise good work, and avoid the problems that come from a job not done properly.
This guide covers tile installation from start to finish: what happens before a tile goes in, the laying process itself, what finishing looks like, and how to evaluate the result.
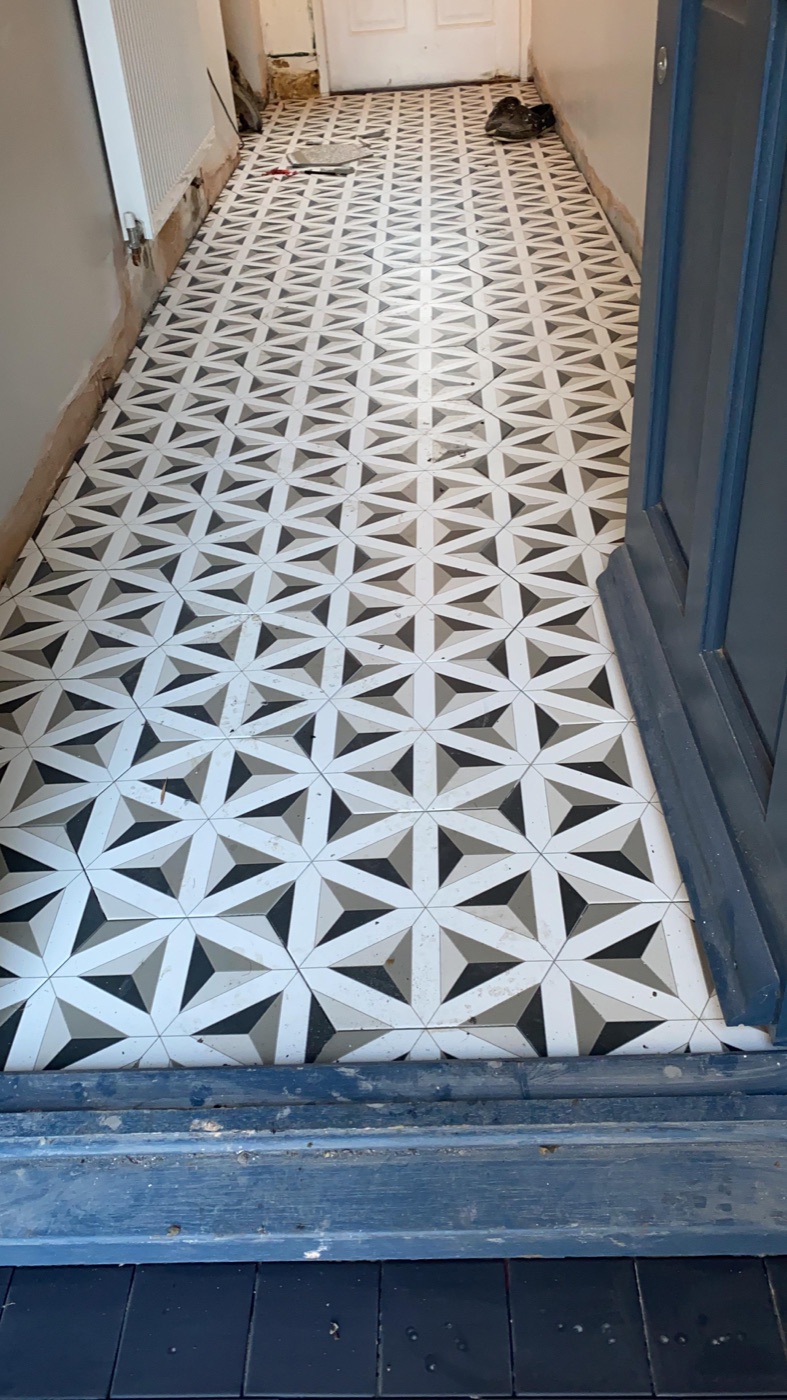 Victorian-inspired geometric star hallway floor, Chislehurst — multi-piece setting-out centred from the front door. The preparation and setting-out for a job like this takes as long as the laying itself. Pattern tiling service
Before a tile goes in: the preparation work
The preparation phase is where most tiling fails are seeded. It is invisible when the job is done, which means there is a temptation to skip it. An experienced tiler does not skip it.
Substrate assessment
Before any tile can be fixed, the surface it is going onto needs to be assessed:
Is it flat? A floor or wall that bows more than 3mm over a 2-metre run is outside tolerance for standard tiles. Large format tiles (over 600mm) have tighter tolerances still. Anything outside tolerance needs correcting before tiling.
Is it sound? Tap across the surface. A hollow sound in plaster means it has lost its key and needs cutting out and re-plastering. Old adhesive or tile that is not fully removed leaves high spots. Timber that flexes under foot load will crack tile.
Is it the right material? Plasterboard in a wet area without a tanking membrane is not correct. Old asphalt or cork underlays are not suitable tile substrates. Some older substrates are contaminated with adhesive release agents that prevent new adhesive from bonding.
Substrate preparation
Depending on what the assessment finds, this can involve:
- Levelling compound on uneven floors
- Boarding out uneven or insufficient walls (6mm Hardiebacker or similar)
- Applying tanking membrane in wet areas (minimum two coats, tape at all joints and changes of plane)
- Priming the surface to reduce suction and improve adhesive bond
Read more on waterproofing: what is tanking and why does it matter?
Setting out
Before laying a single tile, a tiler needs to plan where the tiles will sit. Setting out involves:
Finding the centre. For a floor, the centre of the room is found and marked. For a wall, the setting-out starts from a vertical datum (usually a vertical line from the centre of the most prominent wall). In a herringbone or geometric pattern, the setting-out determines where the pattern sits relative to the room.
Planning the cuts. Working from the centre means the cuts at the perimeter are balanced. This is particularly important in herringbone and geometric layouts where a cut at the wrong point in the pattern looks wrong. I always mark out on the floor or wall before any adhesive is applied, so the customer can see exactly where the tile will sit.
Checking for features. The tile layout needs to account for where sockets, pipe outlets, drain positions, shower heads, and other features are. Cutting around a socket with the cut at the wrong point in the tile pattern looks wrong. This is planned at the setting-out stage, not discovered halfway through laying.
The laying process
Adhesive selection
Different tiles need different adhesives. This is not optional.
Standard porcelain and ceramic (walls): Polymer-modified flexible adhesive. Standard grade.
Floor tiles: Higher-grade flexible adhesive rated for floor use. Large format tiles (over 600mm) need a C2 classification adhesive.
Natural stone and marble: Grey flexible adhesive specific to natural stone. Not white (which can stain porous stone).
Underfloor heating: C2S1 or C2S2 minimum: flexible, heat-stable adhesive. The floor also needs curing at low temperature before full use.
Moisture-sensitive adhesive in wet rooms: The adhesive needs to be fully cured before the area is exposed to water. Do not rush this.
Read more: why tiles crack and tiling over underfloor heating
Laying technique
Full bed. Every tile should have full adhesive contact across the back. Voids behind a tile mean a hollow point where the tile can flex, crack, or delaminate. I back-butter every tile on materials where voids are a risk (natural stone, large format, zellige) and key the substrate bed as well.
Grout line consistency. Tile spacers maintain consistent grout lines during laying. Line consistency matters for the finished result. The grout line width needs to be chosen before the job starts and maintained throughout.
Levelness and alignment. Each tile needs to be in the same plane as its neighbours. On a floor, this means checking with a level across multiple tiles at once. Any tile that is high or low needs to be adjusted before the adhesive sets.
Grouting
Grouting happens after the adhesive is cured. The timing matters: grout applied too soon risks disturbing the tiles. The correct cure time for most adhesives is 24 hours minimum before foot traffic and grouting.
Grout type: Standard cement-based grout for most applications. Epoxy grout for kitchen worktops, pool surrounds, and areas with chemical exposure. Epoxy grout is harder to apply but far more stain-resistant. In kitchens, I increasingly use an epoxy-resin hybrid grout.
Mixing consistency: Grout too wet results in a weak, porous joint. Too stiff and it is hard to work into the joints without voids. The mix needs to be right.
Grouting in sections: Grout is applied, worked into the joints, and cleaned back in sections while it is still workable. Leave it too long and it sets on the tile face and is difficult to remove without damage.
Colour selection: Grout colour is part of the design. A contrasting grout emphasises the tile layout. A matching grout reads more continuously. Neither is wrong, but the choice should be made deliberately.
Silicone finishing
At all internal corners, changes of plane, and junctions with sanitary ware, the joint must be siliconed rather than grouted. This is non-negotiable.
Grout is rigid. These joints move with building movement, thermal cycling, and the weight of people in the room. Rigid grout in a moving joint will crack. Water enters through the crack. Damage follows.
Silicone is flexible. It accommodates movement. It seals the joint. It needs to be the right type (sanitary silicone, mould-resistant, matching the grout colour) and applied in a clean, consistent bead that is tooled flat.
A poorly siliconed joint is one of the most obvious signs of a rushed finish. Read: how to spot good tiling
How long tile installation takes
This varies significantly with room size and complexity. General guides:
Bathroom floor and walls (standard porcelain, straight lay): Two to three days for a typical bathroom, including prep, laying, grouting, and siliconing.
Wet room (including tanking): Add a day minimum for the tanking membrane and cure time before tiling begins.
Pattern tiles (herringbone, geometric): Add time for setting-out and the slower laying pace.
Natural stone or marble: Add time for sealing steps, individual bed adjustment, and more careful grouting.
For a room-specific guide: how long does bathroom tiling take?
What to ask a tiler before you commission them
- What adhesive will you use for this tile on this substrate?
- Is the substrate preparation included in the quote?
- Will the joint between the floor and wall be siliconed or grouted?
- Do you have public liability insurance?
- Do you offer a workmanship guarantee? Is it in writing?
- Can I see examples of recent work?
If a tiler cannot answer the adhesive question clearly, that is a warning sign. If they say the floor-to-wall joint will be grouted, that is wrong. If there is no written guarantee, there is no guarantee.
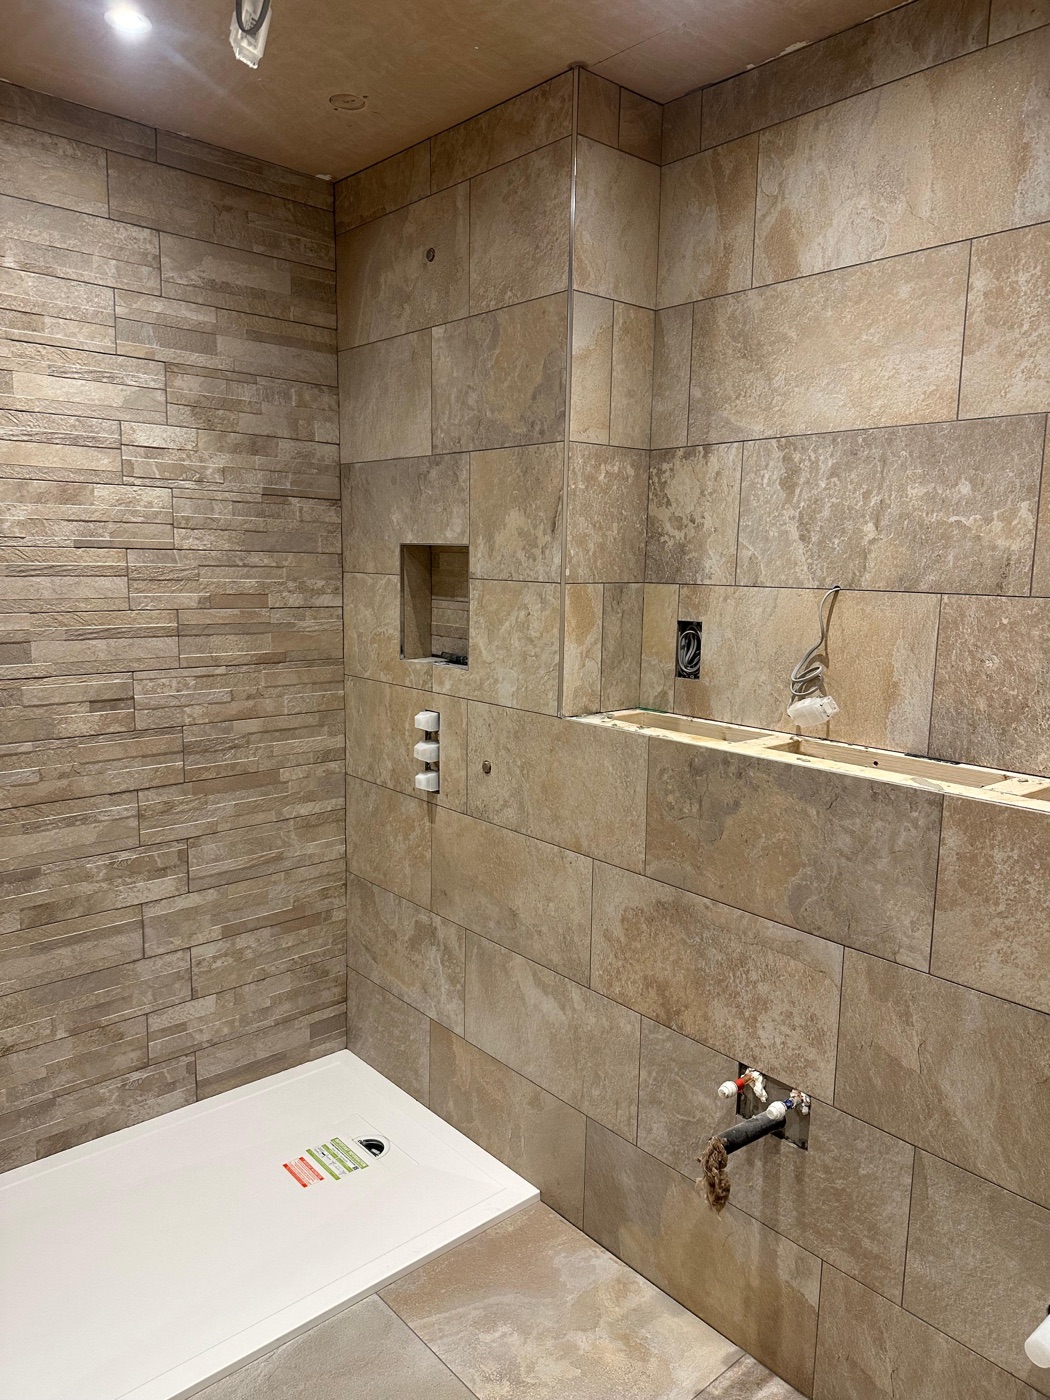 Stone porcelain shower with twin niches and chrome trim, West Wickham — a finished result that demonstrates what correct installation looks like. Tiles level across the field, silicone at all plane changes, niches cut cleanly, grout consistent throughout. Bathroom tiling service
Evaluating the finished result
A properly tiled room should have:
- Consistent grout lines throughout
- No hollow tiles (tap across the surface: a hollow sound means a void behind the tile)
- Silicone joints at all changes of plane, not grout
- Clean, even grouting with no voids or cracks
- Tiles level across the field
- Cuts balanced at the perimeter and away from the most visible points
Anything outside these is a quality issue. The full checklist for evaluating tiling covers this in detail.
Getting an accurate quote
The only way to get an accurate price is a site visit. I offer free, no-obligation quotes across Bromley, Beckenham, Orpington, Chislehurst, West Wickham, and surrounding areas. I will assess the substrate, discuss tile choices, and give you a written price with no pressure to proceed.
Contact for a free quote or see how much does tiling cost in 2026?
FAQ
What is the most important part of tile installation? Substrate preparation. The substrate must be flat, sound, and correctly specified for the tile type. Shortcuts here are invisible when the job is done and become expensive failures later.
Do internal corners need grouting or siliconing? Siliconing. All internal corners, all changes of plane, all junctions with baths, shower trays, and sanitary ware must be siliconed. Grout in these joints will crack.
How soon can I use a tiled bathroom after it is finished? After grouting and siliconing, allow 24-48 hours before light use. Avoid heavy water exposure until the silicone is fully cured, which takes up to 24 hours depending on the product.
What is the difference between C2 and C1 adhesive? Tile adhesive classifications rate adhesion strength, flexibility, and other properties. C2 has higher adhesion than C1. S1 denotes flexibility sufficient for most floor applications. Large format tiles and underfloor heating require at minimum C2S1. Your tiler should specify the correct grade without being asked.
Related reading: How to spot good tiling · Why tiles crack · Tiling cost in 2026 · Bathroom tiles complete guide · Bathroom tiling service
Got a specific question? Call me on 07990 521717 , see the bathroom tiling service, or use the contact form — I'm happy to give advice with no obligation.