Shower Niches: How to Get Them Right (and What Goes Wrong When You Don't)
Everything you need to know about shower niches and recessed shelves. Sizing, positioning, waterproofing, tile alignment, and the installation mistakes that cause water damage.
A shower niche is the most practical upgrade you can make in a bathroom. No suction-cup shelves falling off the wall. No rust-stained wire baskets. No bottles balanced on the edge of the bath. Just a clean, tiled recess built into the wall that holds everything you need.
The concept is simple. The execution requires precision. I build them regularly, and I fix them occasionally — the ones where the waterproofing was missed, the dimensions were wrong, or the tile alignment was an afterthought.
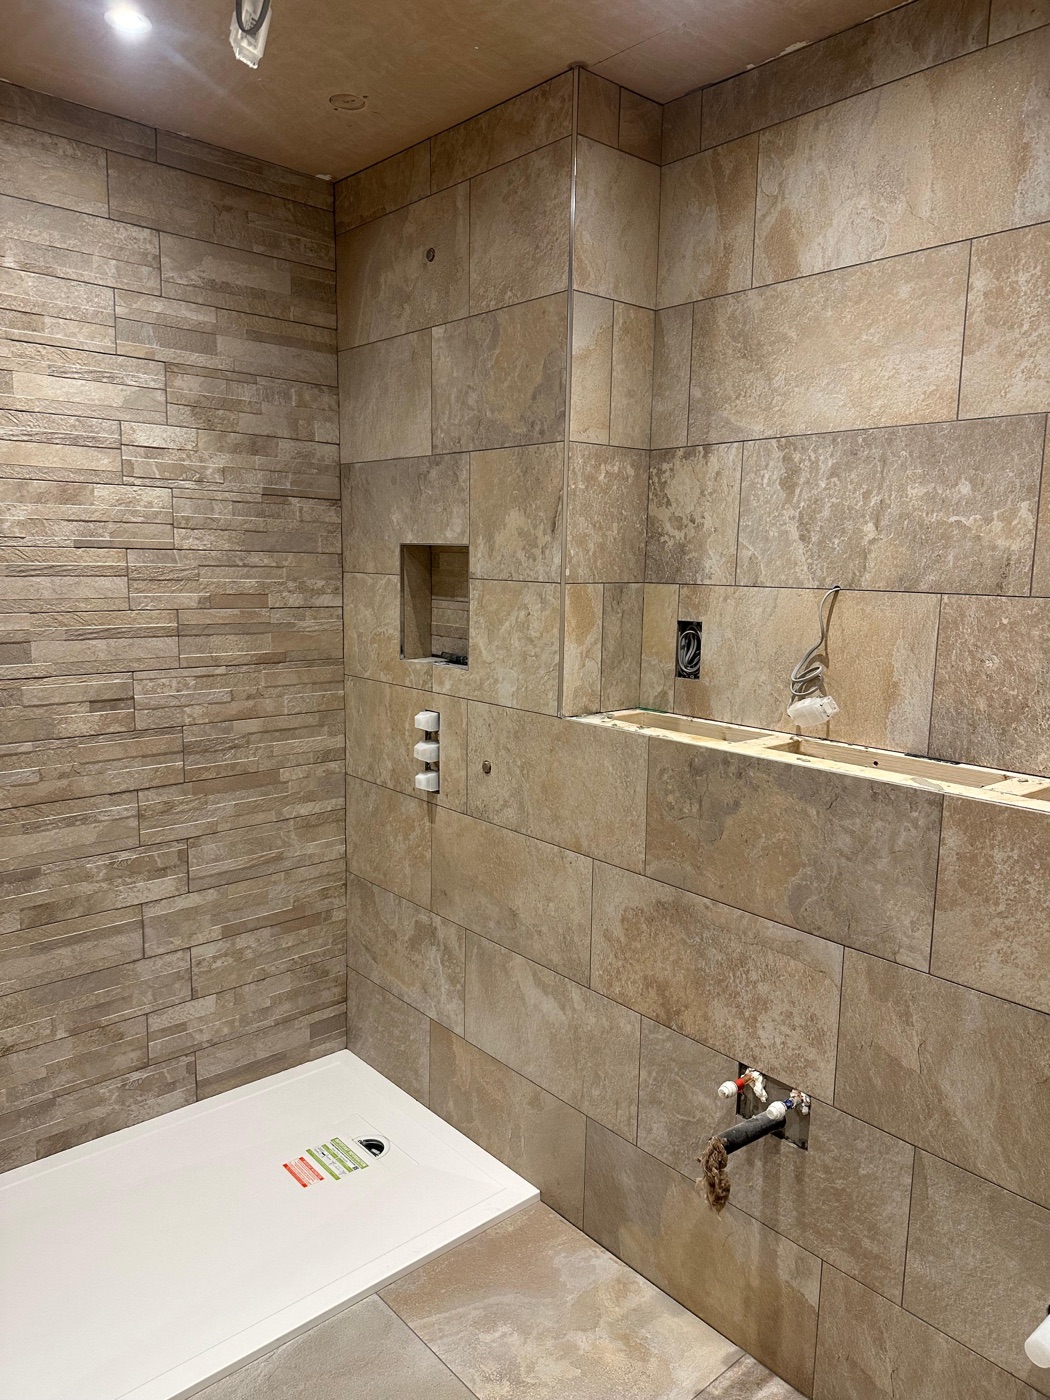 Twin shower niches, West Wickham. Stone-effect porcelain, chrome trim, fully waterproofed behind. The niche dimensions align with the tile format so every tile is a full tile or a clean half. No sliver cuts. No awkward filler pieces. Bathroom tiling service
Planning the niche
Position
The niche should be on a wall where it won’t hit plumbing or structural elements. The shower wall opposite the shower valve is usually the safest option — the plumbing is on the valve wall, leaving the opposite wall clear. In a stud wall, the niche fits between studs. In a masonry wall, the niche is built from tile backer board applied to the wall surface, which means it projects slightly rather than being recessed into the wall.
Height matters for daily use. A niche positioned at shoulder height is comfortable for grabbing shampoo without bending. A niche at waist height works for soap and razors. Twin niches — one high, one low — solve the problem of different items at different heights. The photo above shows this approach.
Dimensions
The cardinal rule: the niche dimensions must work with the tile format. If the tiles are 300x600mm, the niche width should be a multiple of the tile width (300mm, or 600mm for a wider niche). The height should align with the tile coursing so the horizontal grout lines of the niche match the horizontal grout lines of the surrounding wall.
When the niche dimensions don’t align with the tile, you get sliver cuts — narrow strips of tile that look amateur and are difficult to install cleanly. Planning the niche around the tile, not the other way around, is essential.
Depth is typically 80 to 100mm. This is determined partly by the stud depth and partly by what needs to fit inside. A standard shampoo bottle is about 60mm deep. 80mm gives clearance. Going deeper than 100mm makes the niche look cavernous and creates a harder-to-clean interior.
Building the niche
I build niches from tile backer board — typically Schluter Kerdi-Board or Wedi. These are rigid, waterproof-rated boards that provide a stable, tiling-ready surface.
The process:
- Cut the opening in the wall (stud wall) or build the box from backer board (masonry wall).
- Frame the interior with backer board — top, bottom, sides, and back panel.
- Slope the base very slightly toward the front of the niche (a few millimetres). This prevents water from pooling on the shelf. Water sitting on a flat niche floor causes limescale build-up and grout staining. The slope is barely visible but functionally important.
- Waterproof the entire niche. Same tanking membrane as the shower walls. Every surface — including the interior corners, which get fleece tape. The back panel. The top surface where condensation drips. Everything.
- Tile the interior. Starting with the back panel, then the top and bottom, then the sides. The edges can be finished with chrome or brushed nickel tile trim, mitred tile edges, or a Schluter profile.
The waterproofing problem
This is where most niche failures start. The niche creates four additional internal corners and a horizontal surface — all of which are water collection points. If the waterproofing is incomplete, water does what water always does: finds the gap.
I’ve opened up failed niches where the tiler waterproofed the shower walls but not the inside of the niche. The reasoning, presumably, was that the niche is small and the tiles would keep water out. They don’t. Grout is not waterproof. Water migrates through grout joints over time. In a niche where water sits (shampoo drips, soap residue), the migration is constant.
The damage happens inside the wall. The plasterboard or timber behind the niche gets saturated. Mould develops. The board softens. Eventually the tiles in and around the niche lose their bond because the substrate behind them has failed. By the time you see the problem from the front, the wall behind is significantly damaged.
The fix is straightforward: waterproof the niche completely, as part of the shower waterproofing, before any tile goes on. Five minutes of membrane application prevents thousands of pounds of repair.
Finishing details
Trim options
Metal trim (chrome, brushed nickel, matt black). The most common choice. A metal profile at each exposed edge of the niche creates a clean frame. It protects the tile edge from chipping and provides a finished look. Match the trim finish to the shower fixtures.
Mitred tile edges. For a seamless, trim-free look, the tiles at the niche edges are cut at a 45-degree angle and butted together. This requires precision — the mitre must be clean and consistent, and the two angled edges must meet without a gap. It’s more demanding to execute but gives a higher-end result.
Pencil tile border. A thin pencil tile around the niche edge provides a decorative frame. Less common in contemporary bathrooms but works well in traditional or period-style designs.
Contrast tiling
Using a different tile inside the niche — a mosaic, a metallic accent, a contrasting colour — creates a focal point within the shower. The niche becomes a design feature as well as a practical one. This works best when the contrast tile is used only inside the niche, not repeated elsewhere. Restraint is key.
Lighting
Recessed LED strip lighting inside the niche is increasingly popular. A warm white LED strip along the top interior edge of the niche washes the interior with light and creates an atmospheric effect, particularly in evening baths or showers.
The lighting must be IP65 rated for Zone 1 (inside the shower). The cabling must be installed before the waterproofing membrane. The cable entry point through the membrane must be sealed. This adds planning, electrical cost, and coordination — the electrician needs to pre-wire before the tiler waterproofs and tiles.
Common mistakes I see
Niche too wide for the tile format. A 350mm niche with 300mm tiles creates a 50mm sliver cut on one side. The niche should have been 300mm or 600mm wide.
No slope on the niche floor. Water pools, limescale builds up, grout discolours. A tiny forward slope solves this permanently.
Waterproofing omitted or incomplete. The most expensive mistake. The fix is stripping the niche and surrounding tiles, repairing the wall, re-waterproofing, and re-tiling.
Niche positioned over plumbing. Opening up a wall to build a niche and discovering pipes running through the cavity. This should be identified before work starts — a pipe detector or knowledge of the plumbing layout avoids it.
For advice on incorporating a shower niche into your bathroom renovation, get in touch. I plan the niche dimensions around your chosen tile during the site visit so everything aligns before a single tile is cut. See also: shower tile ideas | what is tanking | bathroom tiles complete guide
Got a specific question? Call me on 07990 521717 , see the bathroom tiling service, or use the contact form — I'm happy to give advice with no obligation.