How to Prepare for a Tiler: What to Do Before Work Starts
What homeowners should do before the tiler arrives. Room preparation, material ordering, decisions to make, and what to expect on day one.
The best tiling job in the world starts with a well-prepared room and a well-prepared homeowner. Most of the delays and compromises I see on tiling projects come not from the tiling itself but from the things that should have happened before the tiler arrived.
This guide is what I send to every client after they accept my quote and before work begins.
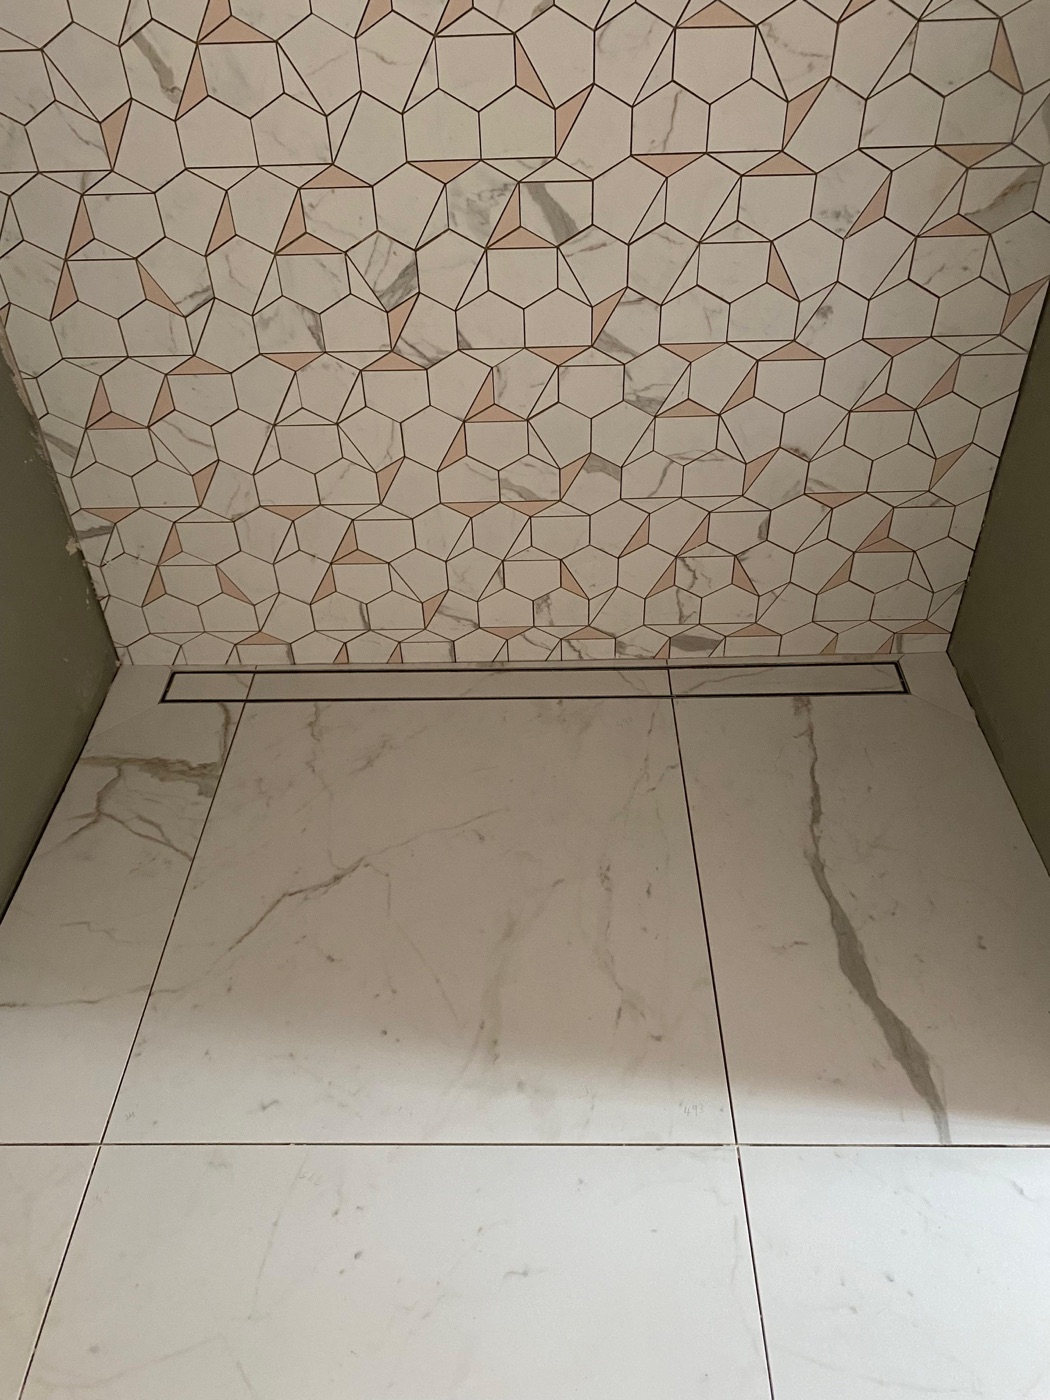 Calacatta gold hexagon bathroom, Bromley. A result like this starts with preparation: correct tiles on site, layout planned, substrate ready, decisions made. The tiling itself is the final stage of a much longer process. Bathroom tiling service
Two weeks before: order materials
Tiles
Order tiles at least two weeks before the tiler’s start date. UK tile supply chains are inconsistent. Popular lines sell out. Special orders from manufacturers take three to six weeks. Tiles that show as in stock online may not be in stock at the warehouse.
Quantity: Measure the area to be tiled (your tiler will confirm during the quote visit) and add:
- 10% extra for straight lay
- 15% extra for herringbone or diagonal
- 20% extra for complex pattern work
Do not order the exact quantity. Running short by one box and waiting two weeks for a restock is the most common preventable delay in bathroom renovations.
Batch numbers: All tile boxes should have the same batch number. Different batches can have slight colour variation that is invisible on individual tiles but visible when laid side by side. Check the batch number on every box when delivery arrives.
Storage: Store tiles flat, in a dry area, off the ground. Do not store heavy boxes stacked more than four high.
Grout and silicone
Buy grout and silicone at the same time as tiles so you can test the colour combination before work starts. Most tilers have preferred products and can advise on the right specification. Discuss this at the quoting stage.
Trims and profiles
If the tile edges will be finished with metal trim (chrome, brushed nickel, matt black), order the trim at the same time as the tiles. Match the trim finish to your bathroom fixtures (taps, shower, towel rail).
One week before: prepare the room
Clear the space
Bathroom: Remove all personal items, towels, bath mats, toiletries, mirrors (if they are in the tiling area), free-standing furniture, and anything that could be damaged by dust or moisture. Cover the toilet if it is staying in place. The tiler needs clear access to every wall and the full floor.
Kitchen: Empty the under-counter cupboards on the side where the tiler will be working. Move the fridge, washing machine, and dishwasher if they are in the tiling zone (or discuss with the tiler who will move them). Clear the worktops.
Hallway: Remove all shoes, coat racks, console tables, and anything stored in the hallway. The tiler needs the full floor clear.
Protect adjacent areas
Tiling generates dust, particularly during tile cutting and substrate preparation. Close doors to adjacent rooms. Cover valuable furniture in connected rooms with dust sheets. If the tiler is cutting tiles inside the property (most do, using a wet cutter that contains most of the dust), identify where the cutting station will go.
Access and parking
Let the tiler know where to park, how to access the property, and where they can store tools and materials. A clear path from the vehicle to the work area saves time and prevents damage.
Decisions to make before day one
Every design decision should be made before tiling starts. Deferring decisions to the day of causes delays and compromises. Make these choices in advance:
Tile layout. Straight lay, brick bond, herringbone, or pattern? Which direction does the tile run? Discuss this with the tiler at the quoting stage.
Where tiles start and stop. Full height or half height? Tiles behind the toilet or not? Tiles behind the bath panel or not? Every boundary needs a decision.
Grout colour. Matching, contrasting, or tonal? Test a sample on a spare tile and let it dry fully before confirming. See grout colour guide.
Niche details. If the shower has a recessed niche, confirm the size, position, and internal tile choice before work starts. The niche needs to be built into the wall before tiling begins. See shower niches guide.
Trim type and finish. Chrome, brushed nickel, matt black, or mitred tile edges? Match to your fixtures.
Silicone colour. Match to grout colour. Your tiler can advise.
What to expect on day one
For a bathroom retile
Morning: The tiler assesses the room, confirms the layout, and begins substrate preparation. If old tiles are being removed (strip-out), this takes the first portion of the day. It is messy and noisy.
Afternoon: Substrate repair and preparation. Replacing damaged plasterboard, applying backer board, levelling the floor, tanking wet areas. This is the invisible work that determines whether the tiling lasts.
Visible tiling may not start until day two. This is normal. Preparation work is not wasted time: it is the most important part of the job. A tiler who is laying tiles within the first hour of arriving has not prepared the substrate properly.
For a kitchen floor
Morning: Existing floor covering removed (if applicable). Substrate assessed for flatness, moisture, and condition. Levelling compound applied if needed.
Afternoon: Levelling compound cures (may need overnight). Decoupling membrane laid if applicable. Setting out begins.
Tiling typically starts on day two for kitchen floors, after the preparation work has cured.
How to communicate during the job
Be available for questions. Decisions that seem obvious sometimes have a choice point that the tiler cannot resolve without your input. “The layout works better starting here, but it means a narrow cut at that wall: are you happy with that?”
Trust the process. If the first day looks like a mess with no tiles on the wall, that is normal. Preparation generates debris. The visible result comes later.
Raise concerns early. If something does not look right to you, mention it while the adhesive is still wet and adjustments are possible. Once tiles are set, changes mean removing and re-doing.
Final walkthrough. At the end of the job, walk through the room with the tiler. Check grout lines, silicone, cuts, and any details you specifically discussed. A good tiler will not leave until you are satisfied.
For a free site visit and detailed quote in Bromley or South East London, get in touch. I cover preparation requirements, timescales, and material ordering in every quote so there are no surprises, whether it is a bathroom retile in Bromley or a kitchen floor.
See also: tile installation guide | bathroom renovation timeline | how to choose a tiler
Got a specific question? Call me on 07990 521717 , see the bathroom tiling service, or use the contact form. I'm happy to give advice with no obligation.